
Suturing techniques for dental professionals

Introduction to Dental Suturing
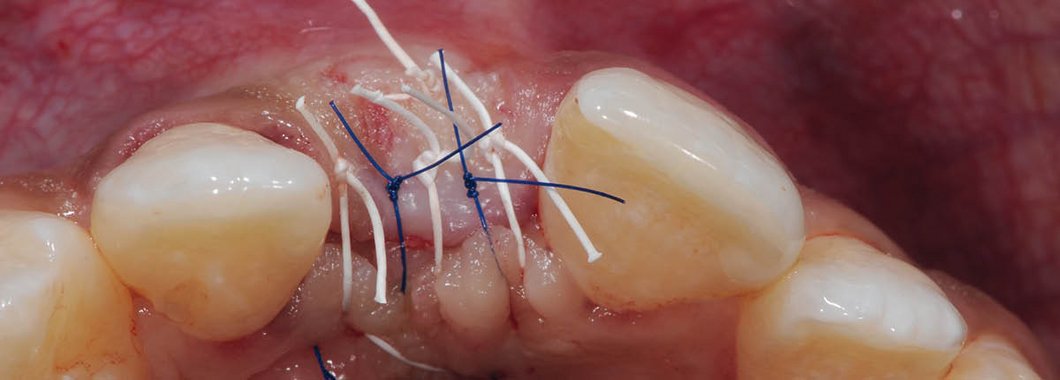
Successful wound closure is a critical component of dental and periodontal surgery. Effective wound closure and suturing techniques help stabilize tissues, promote optimal healing, reduce the risk of infection, and improve patient outcomes. Understanding appropriate suture selection, needle choice, and suturing techniques is essential for both dental students and young clinicians.
Basic Suturing Techniques
Simple Interrupted Sutures
Simple interrupted sutures are the most commonly used technique for routine wound closure. They provide excellent control of wound edge approximation and allow individual sutures to be adjusted independently.
Horizontal Mattress Sutures
Horizontal mattress sutures are commonly used when tension-free closure is required across larger wound gaps. They help distribute tension evenly and enhance wound stability.
Choosing the Right Suture Material
The primary considerations when selecting a suture are whether it is absorbable or non-absorbable and whether it is monofilament or multifilament.
Absorbable Sutures
Absorbable sutures gradually dissolve within the tissues and do not require removal. They are particularly useful for deep tissue closure, including fascia, muscle, joint capsules, and adipose tissue. However, they do not provide permanent tensile strength and may be associated with a slightly increased risk of infection.
Non-Absorbable Sutures
Non-absorbable sutures must be removed after healing. They provide longer-lasting tensile strength and are commonly used in situations where prolonged tissue support is required.
Monofilament Sutures
Monofilament sutures consist of a single strand and offer several advantages:
- Cause less tissue trauma
- May support favorable soft-tissue healing
- Lower risk of bacterial colonization and infection
- Some materials exhibit "memory," making knot tying more challenging
Multifilament Sutures
Multifilament sutures are composed of multiple braided strands.
Advantages include:
- Easier handling
- More secure knot tying
- Reduced knot slippage
Potential disadvantages include:
- Increased bacterial retention
- Higher infection risk
- Potentially less favorable esthetic outcomes
Choosing the Appropriate Needle
Needle selection plays a key role in successful wound closure.
Cutting Needles
Cutting needles are preferred for oral mucosal tissues because they penetrate dense tissues efficiently and with minimal resistance.
Tapered or Round-Bodied Needles
Round-bodied or tapered needles are often suitable for subcutaneous tissue closure, where tissue separation rather than cutting is preferred.
Understanding Conventional Suture Sizing
Sutures are commonly classified using either the traditional "0" gauge system or the metric system, which represents the actual diameter of the suture in millimeters.
Although the metric system is more precise, the "0" gauge system remains widely used in clinical practice. As a general rule, the greater the number of zeros (for example, 5-0, 6-0, or 7-0), the finer the suture.
Comparison of Metric Suture Sizes and United States Pharmacopeia and British Pharmacopoeia (USP/BP) Suture Gauge Sizes
| Approx. diameter (mm) | Metric size | USP/BP size |
|---|---|---|
| 0.05 | 0.5 | 7-0 |
| 0.07 | 0.7 | 6-0 |
| 0.10 | 1 | 5-0 |
| 0.15 | 1.5 | 4-0 |
| 0.20 | 2 | 3-0 |
| 0.30 | 3 | 2-0 |
| 0.35 | 3.5 | 0 |
Placing Sutures Correctly
Proper suture placement is fundamental to achieving predictable healing.
The needle should be grasped approximately one-third of the distance from the swaged end. This provides optimal control while allowing maximum visibility as the needle exits the tissue.
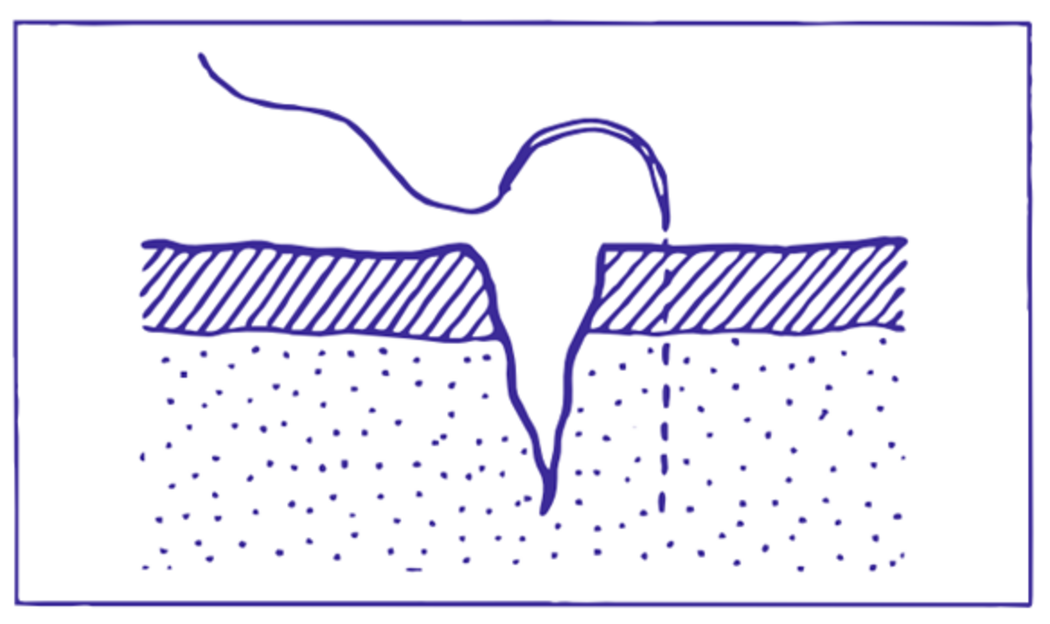
Creating Proper Wound Edge Eversion
Wound edges should be slightly everted to promote optimal tissue adaptation and minimize scarring. This is accomplished by:
- Inserting the needle at a right angle to the tissue surface
- Following the natural curvature of the needle
- Exiting the tissue at an equivalent point on the opposite side
- Taking equal tissue bites on both sides of the wound
The needle entry point is typically positioned approximately 5 mm from the wound margin, depending on tissue thickness and surgical requirements (Fig. 1).
Knot-Tying Fundamentals
Secure knot tying is essential to maintain wound closure during healing.
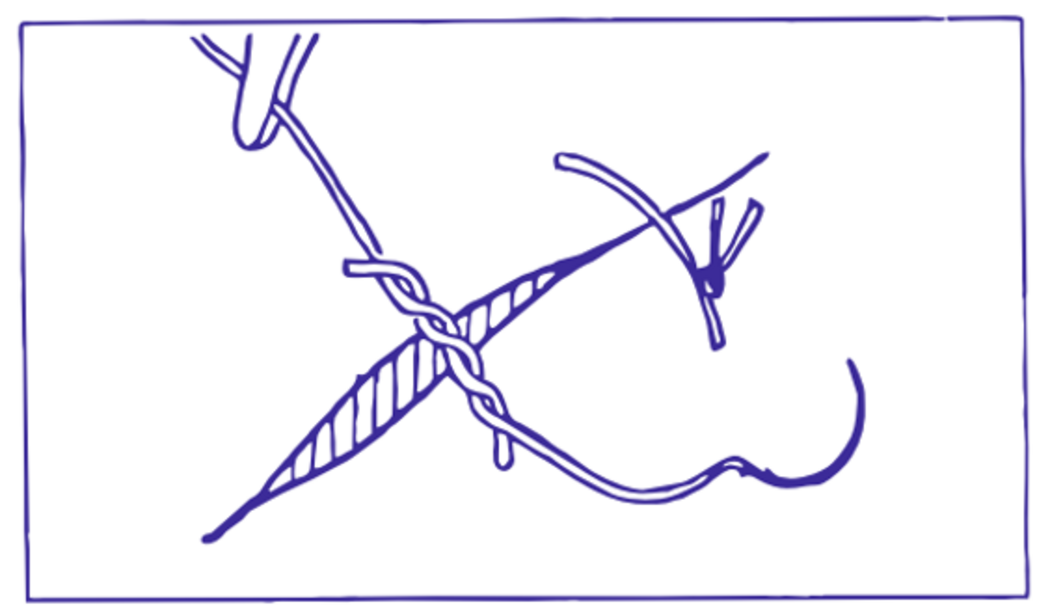
The First Throw
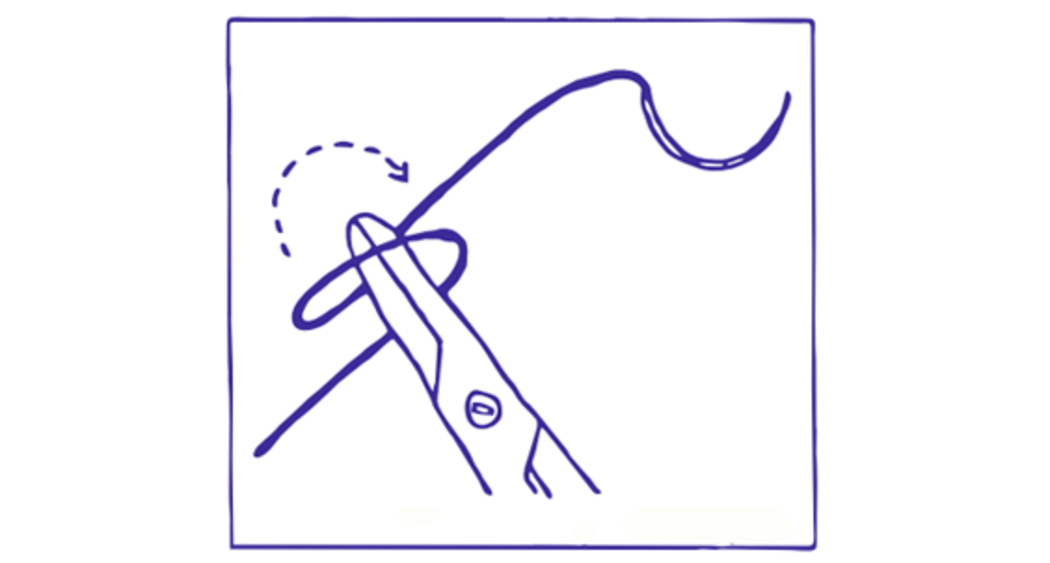
Hold the needle holder in the dominant hand and wrap the suture twice around the instrument before grasping the free end (Fig. 2). Carefully slide the knot down while maintaining appropriate tension.
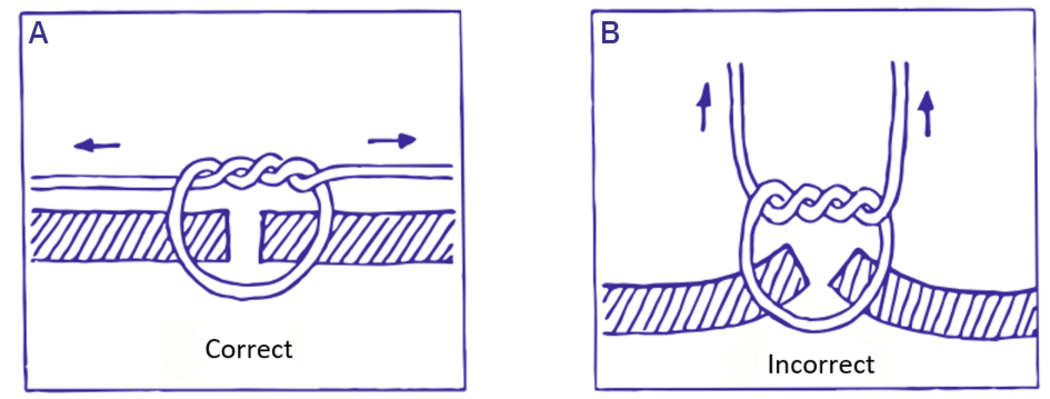
A properly placed first throw establishes the foundation for a secure surgical knot. When tightening the throw, the suture ends should be pulled in opposite directions, parallel to the wound, rather than upward (Fig. 3).
The Second Throw
The orientation of the second throw determines knot stability.
- If wrapped in the opposite direction to the first throw, a reef (square) knot is formed.
- If wrapped in the same direction, a granny knot is created.
A reef knot provides greater stability, while a granny knot may allow controlled tightening before final knot completion (Fig. 4).
The Final Throw
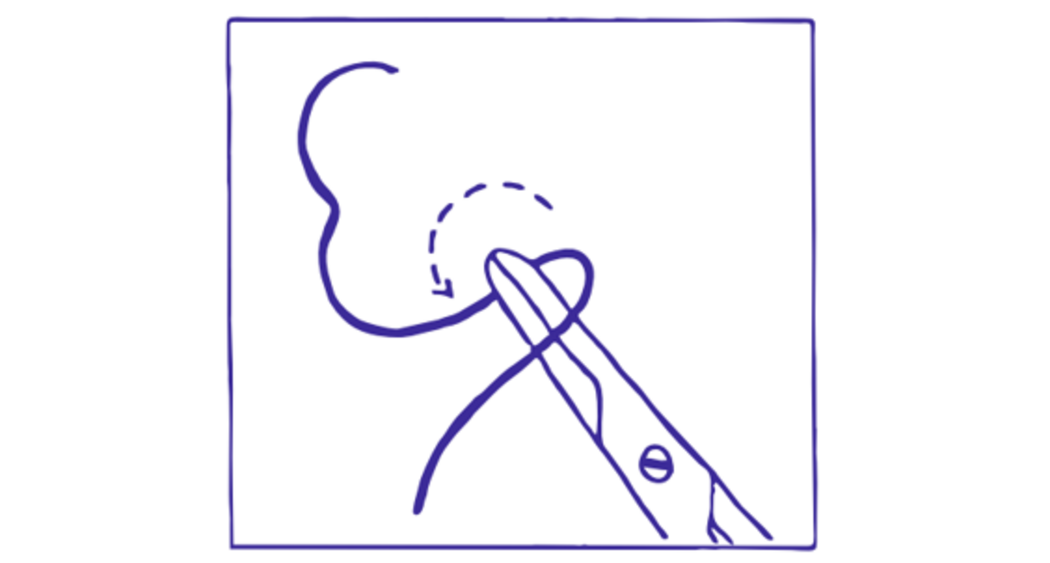
The final throw secures the knot by locking it into position. One of the subsequent throws must be tied in the opposite direction to ensure knot stability (Fig. 5).
All knots should be positioned consistently on one side of the wound. Suture ends should be trimmed while leaving sufficient length for easy removal.
Subcutaneous Sutures
Managing Dead Space
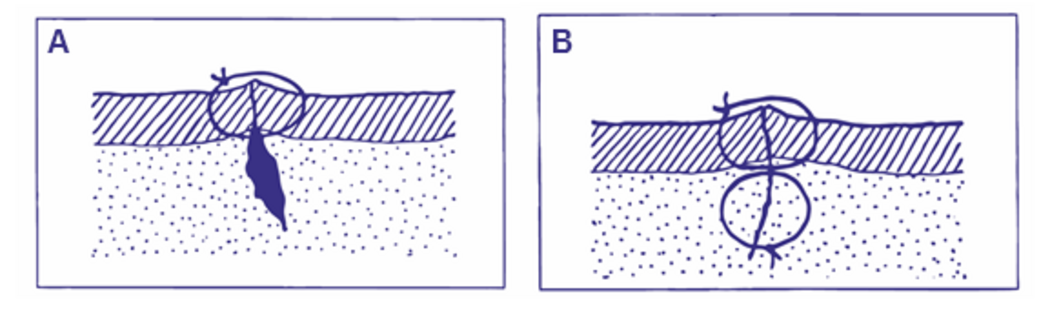
Subcutaneous sutures help eliminate dead space within deeper wounds (Fig. 6). This reduces the risk of:
- Hematoma formation
- Wound breakdown
- Secondary infection
However, because additional suture material may increase bacterial accumulation, subcutaneous sutures should be used only when clinically indicated.
Microsutures in Periodontal Surgery
Suture Selection for Microsurgery
Microsurgical techniques require greater precision than conventional suturing methods. The limited operative field, smaller needles, and finer suture materials demand excellent hand coordination and precise instrument control.
The choice of microsuture depends on the surgical application, tissue characteristics, and procedural objectives.
Typical periodontal microsurgical suture sizes include:
- 6-0
- 7-0
- 8-0
In conventional periodontal surgeries, larger sutures are generally used:
- 4-0
- 5-0
Smaller sutures cause less tissue trauma and support more precise wound adaptation, which may contribute to improved healing outcomes.
Conclusion
Mastering suturing wound management is a fundamental skill for every dental professional. Appropriate selection of suture materials and needles, combined with meticulous tissue handling and sound knot-tying techniques, can significantly improve healing, reduce complications, and contribute to long-term surgical success.

Dr. Vikram Ahuja
Dental Implant Specialist,
MDS, FICOI (US), MADI (UK), MRC (UK), MFPA (UK), DFO (Pune), MBA (Hospital Management), PG Dip Forensic OD,
KOSMIC Dental Clinic, Lucknow, India